How to Create the Perfect Skincare Routine (Naturally)
A complete step-by-step guide for radiant, healthy skin, face, lips, and all.
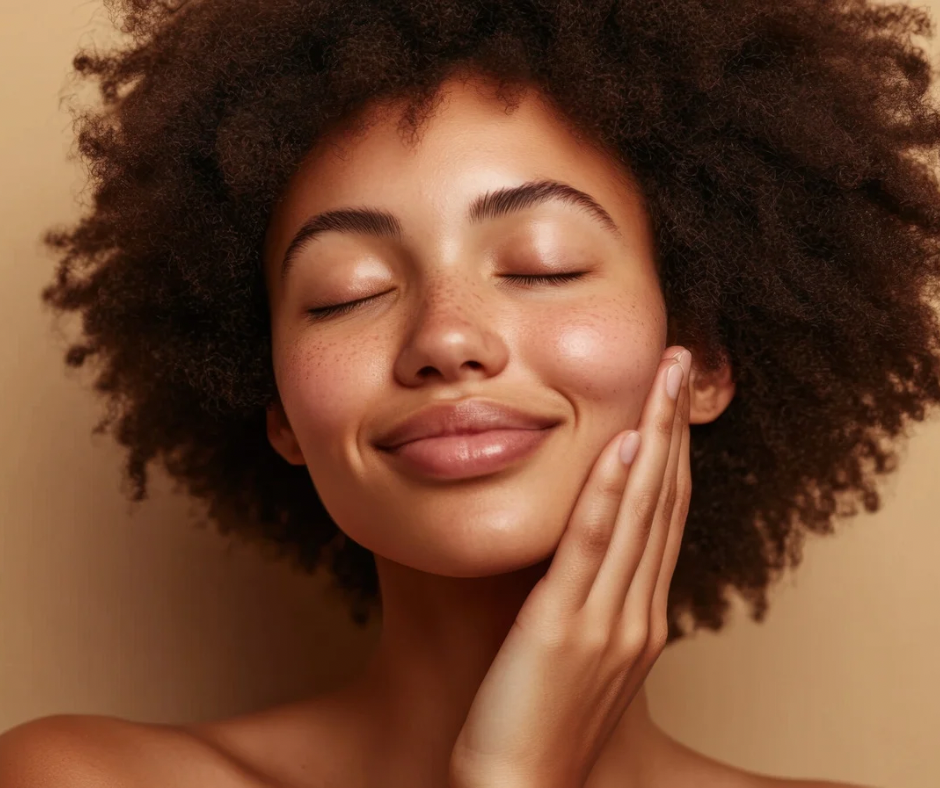
Your skincare routine is more than a beauty ritual, it’s a daily love letter to yourself. With every gentle cleanse, nourishing mask, and soothing serum, you’re not just pampering your face but you’re caring for your skin’s health, your glow, and your peace of mind. A truly effective skincare routine isn’t built on hype or harsh chemicals but it’s built on consistency, natural ingredients, and a deep understanding of your skin’s unique needs. In this guide, you’ll learn how to create a personalized, head-to-lips skincare ritual that supports healthy, radiant skin from the inside out.

Understanding Your Skin Type
Before you build the perfect skincare routine, you need to understand what kind of skin you’re caring for. Knowing your skin type helps you choose the right products, avoid irritation, and give your skin exactly what it needs to glow.
Here’s a simple breakdown of the five main skin types and how to identify which one is yours:
1. Dry Skin
Feels: Tight, flaky, dull, rough
Looks: Matte or ashy with visible dry patches
Needs: Deep hydration, rich creams, nourishing oils
Test tip: After cleansing, your skin feels tight or parched within 10 minutes.
Full Dry Skin Guide: https://thezenani.com/dry-skin-care-routine-the-ultimate-guide-to-soothing-and-treating-dry-skin/
2. Oily Skin
Feels: Slick or greasy, especially in the T-zone (forehead, nose, chin)
Looks: Shiny with visible pores and occasional breakouts
Needs: Lightweight hydration, gentle exfoliation, oil-balancing treatments
Test tip: Your face looks shiny within a few hours of washing, and makeup tends to slide off.
Full Oily Skin Guide: https://thezenani.com/oily-skin-the-ultimate-guide-to-combating-acne-prone-skin/
3. Combination Skin
Feels: Oily in the T-zone but dry or normal on the cheeks
Looks: Shiny and dry in different zones, sometimes with breakouts in one area only
Needs: A balanced routine that is hydrating but not heavy
Test tip: You notice both dryness and oiliness on different areas of your face at the same time.
Full Combination Skin Guide: https://thezenani.com/combination-skin-the-ultimate-skin-care-guide-to-balancing-out-your-combination-skin-type/
4. Sensitive Skin
Feels: Easily irritated, reactive to new products, sometimes itchy or burning
Looks: Redness, flakiness, or rash-like bumps
Needs: Calming, fragrance-free, gentle ingredients
Test tip: Your skin reacts quickly to strong ingredients or weather changes.
Full Sensitive Skin Guide: https://thezenani.com/sensitive-skin-the-ultimate-guide-to-your-sensitive-skin-type/
5. Normal Skin
Feels: Balanced that means not too oily, not too dry
Looks: Smooth, even tone, minimal issues
Needs: Maintenance and protection
Test tip: Your skin rarely reacts, doesn’t feel greasy or dry, and stays consistent year-round.
Pro Tip: Your skin type can change over time due to hormones, stress, weather, or lifestyle choices. so reassess every few months and adjust your products as needed
Full Normal Skin Guide: https://thezenani.com/normal-skin-type/
The Daily Skincare Routine (AM & PM)
Great skin is built on what you do every day. Your morning and evening rituals don’t have to be complicated but they just need to be consistent, intentional, and gentle. Whether you’re dry, oily, sensitive, or somewhere in between, these steps will help you create a natural skincare routine that nurtures your skin morning and night.
Your Morning Routine: Prep & Protect
Your morning skincare routine should refresh, hydrate, and protect your skin from environmental stressors like sun, pollution, and dehydration.
Step 1: Cleanse (Gently)
Use a mild, non-foaming cleanser to remove overnight oils and sweat without stripping your skin.
Best natural options:
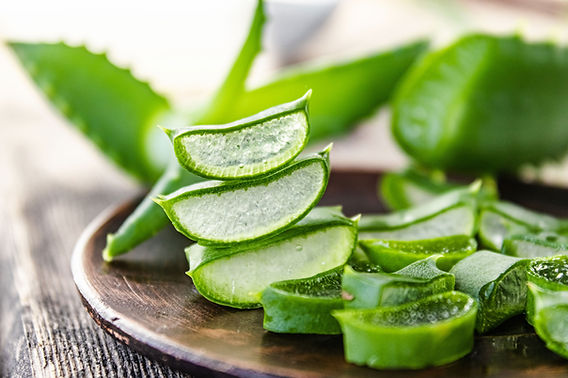
- Aloe vera-based gel cleanser
- Raw honey cleanser (antibacterial + hydrating)
- Oat milk or goat milk cleanser
Pro tip: No need to scrub. A 60-second gentle cleanse is all you need in the morning.
Step 2: Tone
Toning balances your skin’s pH, tightens pores, and preps your skin for the next steps.
Best natural toners:
- Rosewater (hydrating + calming)
- Witch hazel (for oily or acne-prone skin)
- Green tea (antioxidant-rich)
Apply with a reusable cotton pad or spritz directly onto your face.
Step 3: Serum or Treatment
This is where you feed your skin high-potency nutrients.
Morning go-to ingredients:
- Vitamin C (brightens + protects against free radicals)
- Hyaluronic acid (plumps + hydrates)
- Niacinamide (evens tone + strengthens barrier)
Use 2–3 drops and press it into your skin.
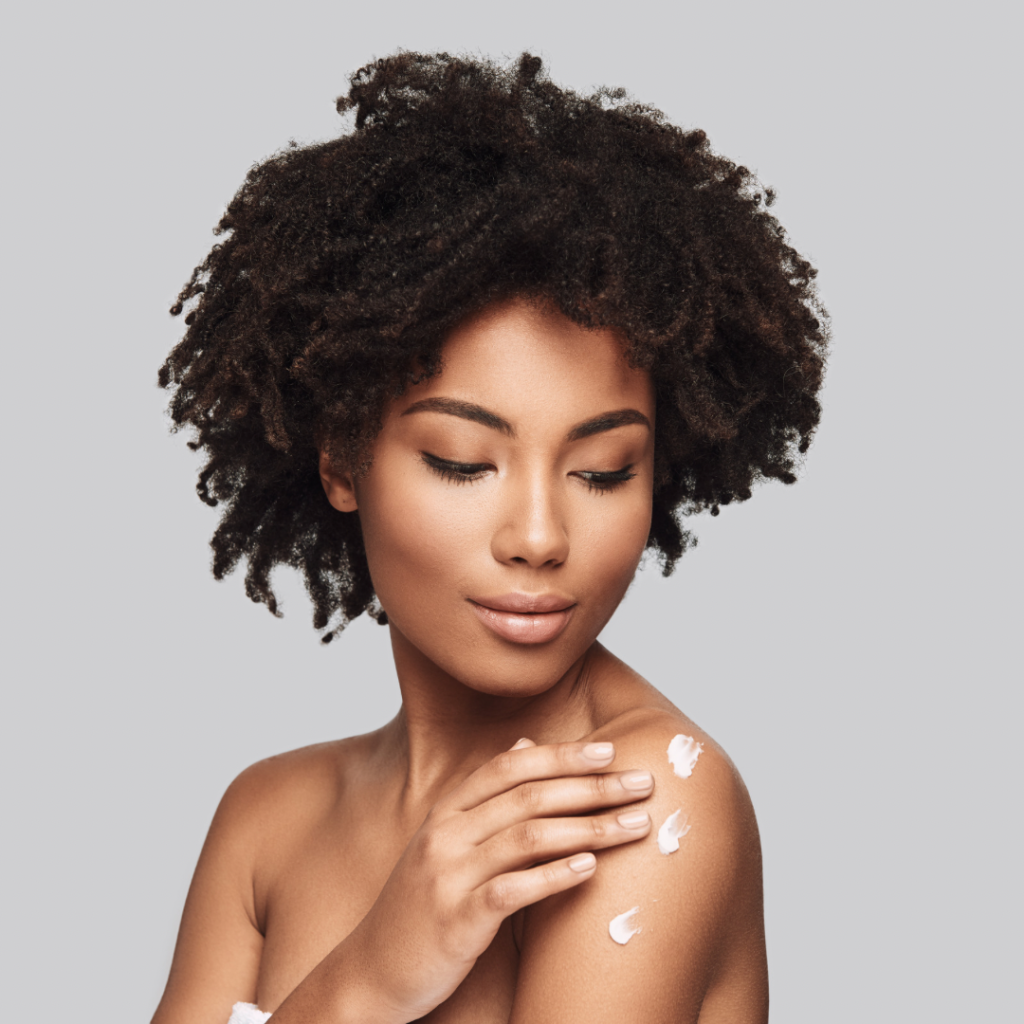
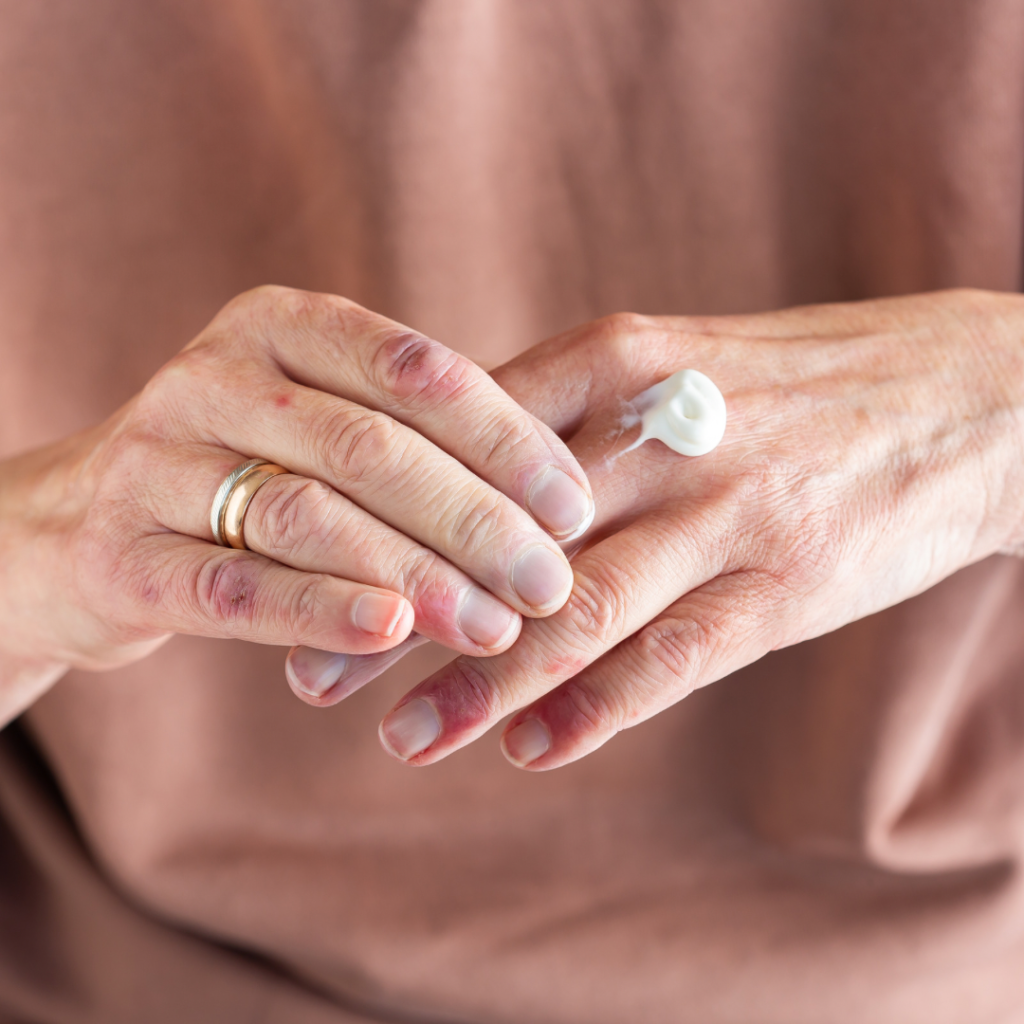
Step 4: Moisturize
Lock in hydration with a lightweight, natural cream or lotion.
Best ingredients:
- Aloe vera + jojoba oil
- Rosehip seed oil
- Shea butter (in small amounts for dry skin)
Choose a lighter formula during the day to avoid greasiness.
Step 5: SPF (Do Not Skip!)
Sun protection is your #1 anti-aging and glow-preserving secret.
Use a mineral sunscreen with zinc oxide or titanium dioxide (SPF 30+), especially if you use vitamin C.
Apply it daily, even on cloudy days or indoors.
Your Night Routine: Repair & Replenish
Evening is the perfect time to help your skin recover and renew. Your nighttime routine focuses on deeper hydration, skin repair, and gentle treatment.
Step 1: Double Cleanse (If You Wore Makeup or SPF)
- Oil cleanse first to break down makeup, sunscreen, and buildup
- Use olive oil, grapeseed oil, or a DIY cleansing balm
- Follow with a gentle water-based cleanser to finish the job
If you didn’t wear makeup or SPF, one gentle cleanse is fine. lol
Step 2: Tone or Mist
Same as your AM routine, use a natural toner to refresh and balance.
Step 3: Serum or Night Treatment
Your skin repairs itself at night so you can help it along with restorative ingredients like:
- Hyaluronic acid (deep hydration)
- Bakuchiol (natural retinol alternative)
- Licorice root or sea buckthorn (to fade dark spots)
Step 4: Moisturize or Overnight Mask
Use a thicker moisturizer at night to prevent water loss and wake up glowing.
Try:
- A rich shea butter + rosehip oil cream
- Overnight honey + aloe gel mask (DIY)
- Layer your moisturizer with a few drops of facial oil for extra softness
Optional Step 5: Facial Oil or Gua Sha Massage
Seal in everything with a few drops of oil and use a gua sha stone or your fingers to gently massage your face upward. This boosts circulation, relaxes tension, and promotes glow.
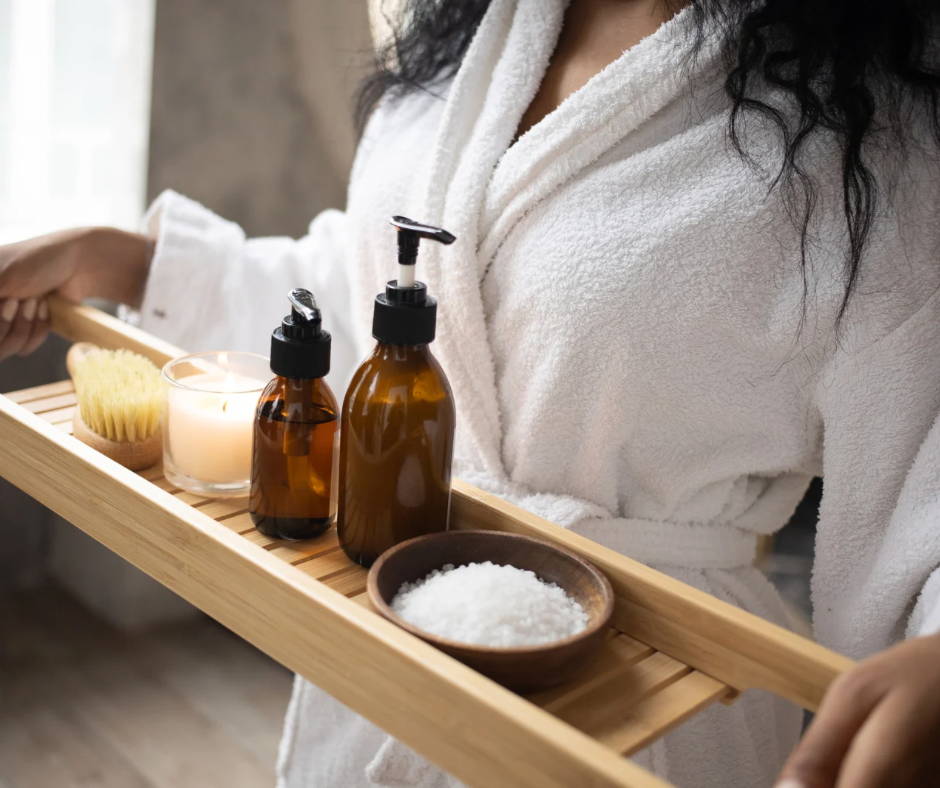
Weekly Skincare Rituals for Glowing Skin
While your daily routine keeps your skin balanced and nourished, weekly rituals offer a deeper level of care. These once-a-week (or biweekly) treatments exfoliate, detox, and revitalize your skin by leaving it noticeably smoother, softer, and more radiant.
Think of these as your spa-at-home moments that are essential for both your skin and your soul.
1. Exfoliate (1–2x per week)
Why it matters: Dead skin cells can clog pores, dull your complexion, and block your skincare from working. Gentle exfoliation reveals fresh, glowing skin and boosts circulation.
Natural options:
- Oatmeal + yogurt scrub (sensitive skin)
- Brown sugar + honey scrub (dry or dull skin)
- Papaya or pineapple enzyme mask (brightening, gentle exfoliation)
Tip: Avoid over-scrubbing. Massage in light, circular motions and let natural enzymes or grains do the work.
2. Steam Your Face (1x per week)
Why it matters: Facial steaming opens pores, softens debris, and enhances the absorption of masks, serums, and oils.
How to do it:
- Boil water and pour into a bowl.
- Add a few drops of essential oils (like lavender, chamomile, or tea tree) or herbs like rose petals or calendula.
- Place a towel over your head and lean over the bowl for 5–10 minutes.
Caution: Don’t steam if you have active rosacea or broken capillaries.
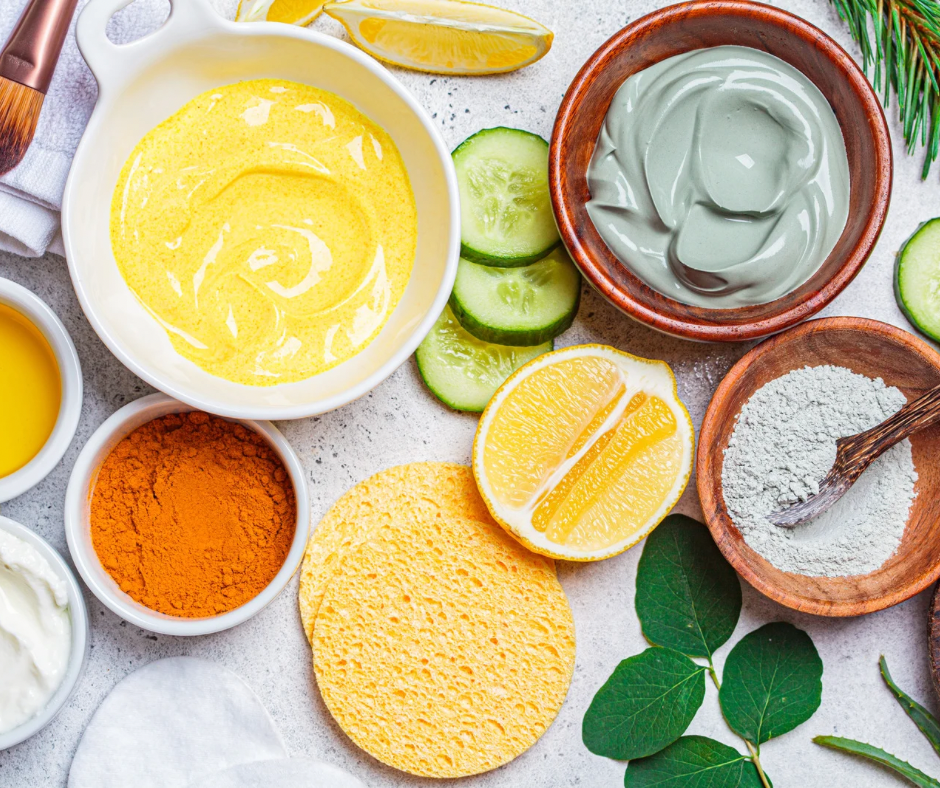
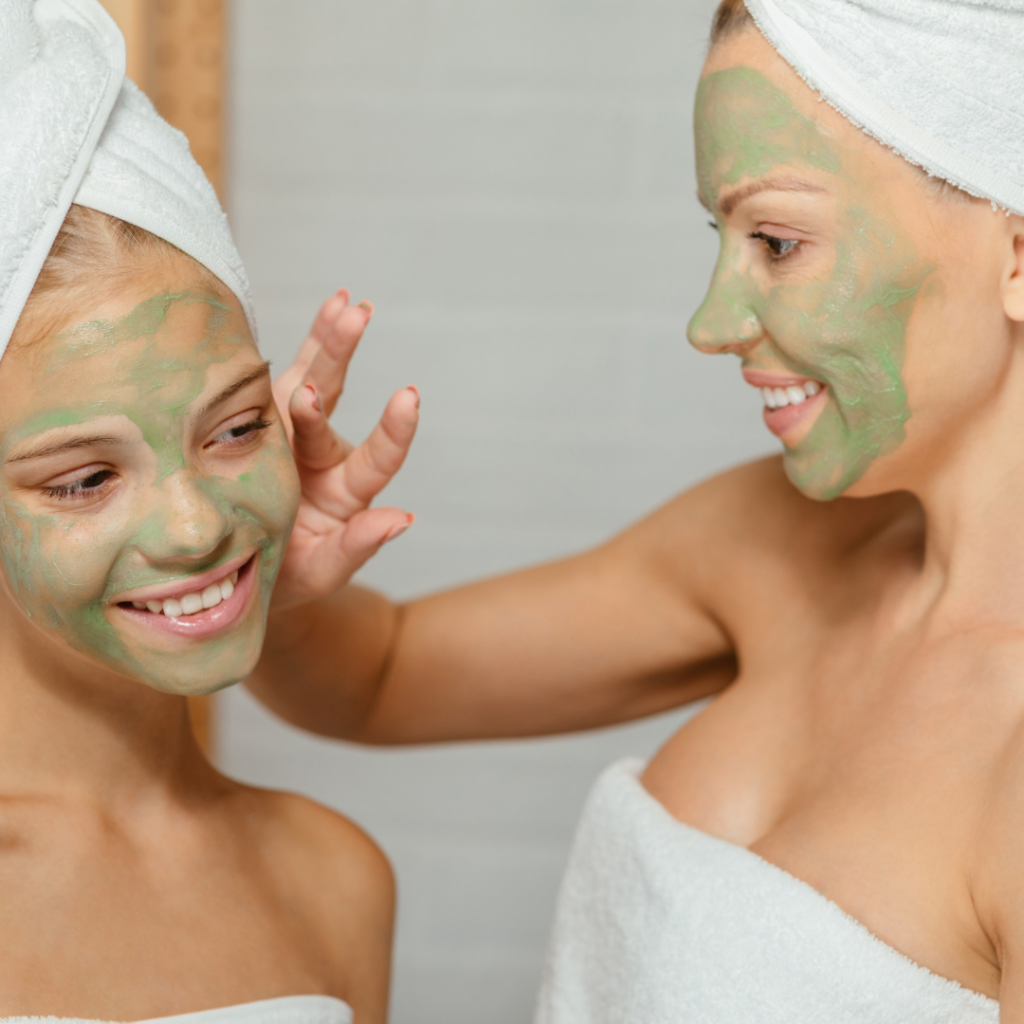
3. Apply a Face Mask (1–2x per week)
Why it matters: Masks allow concentrated ingredients to deeply treat your skin, whether you need hydration, detox, or calming effects.
Mask ideas by skin type:
- Dry: Avocado + honey
- Oily/Acne-Prone: Bentonite clay + aloe Vera juice
- Sensitive: Aloe vera + chamomile tea + honey
- Dull skin: Turmeric + yogurt + lemon hydrosol
Multi-mask! Use different masks on different areas of your face as needed (e.g. clay on your T-zone, aloe on cheeks).
4. Facial Massage or Gua Sha (1–2x per week)
Why it matters: Stimulates blood flow, reduces puffiness, sculpts the face, and supports lymphatic drainage.
What you’ll need:
- A few drops of facial oil (jojoba, rosehip, or squalane)
- Clean hands, gua sha tool, or jade roller
Use upward strokes and gentle pressure, especially along the jawline, cheeks, and neck.
DIY Skincare Recipes for Weekly Rituals
1. Oatmeal + Yogurt Scrub (for Sensitive Skin)
Soothes, gently exfoliates, and calms redness
Ingredients:
- 2 tbsp finely ground oats (colloidal oats or blended rolled oats)
- 1 tbsp plain unsweetened yogurt (or coconut yogurt for vegan option)
- 1 tsp raw honey (optional for added hydration)
Instructions:
- Mix all ingredients into a paste.
- Apply to damp skin using gentle circular motions.
- Let sit for 5 minutes before rinsing with lukewarm water.
Use once per week to calm and soften the skin without irritation.
2. Brown Sugar + Honey Scrub (for Dry or Dull Skin)
Buffs away dead skin cells while moisturizing and boosting glow
Ingredients:
- 1 tbsp raw honey
- 1 tbsp brown sugar
- 1 tsp olive oil or sweet almond oil
Instructions:
- Mix ingredients into a thick, gritty paste.
- Apply gently in circular motions for 1–2 minutes.
- Rinse with warm water and pat dry.
Great to use before applying a hydrating face mask or oil.
3. Papaya Enzyme Mask (for Brightening + Mild Exfoliation)
Natural fruit enzymes help remove dead skin and even skin tone
Ingredients:
- 2 tbsp mashed ripe papaya
- 1 tsp plain yogurt (for lactic acid boost)
- 1/2 tsp honey
Instructions:
- Mix ingredients well and apply to clean face.
- Let sit for 5–8 minutes (avoid leaving too long).
- Rinse with cool water and follow with toner + moisturizer.
Use once a week for glowing, refreshed skin.
4. DIY Herbal Steam (for All Skin Types)
Opens pores, boosts circulation, preps skin for treatments
Ingredients:
- 2–3 cups boiling water
- 1 tsp dried lavender or chamomile flowers
- 1 tsp dried rose petals or calendula
- Optional: 1–2 drops essential oil (tea tree for acne, rose for dry skin)
Instructions:
- Add herbs to a large bowl and pour boiling water over them.
- Place your face over the bowl (10–12 inches away) and cover your head with a towel.
- Steam for 5–10 minutes, breathing deeply and relaxing.
Follow with a clay or hydrating mask for maximum benefit.
5. Clay Detox Mask (for Oily or Congested Skin)
Detoxifies, absorbs oil, and clears pores
Ingredients:
- 1 tbsp bentonite or French green clay
- 1 tsp apple cider vinegar or rosewater
- 1 tsp aloe vera gel or honey
Instructions:
- Mix clay with liquid to form a smooth paste.
- Apply to face (avoid eyes and lips).
- Let dry for 8–10 minutes, then rinse gently with warm water.
Use 1–2x/week only. Follow with hydration.
6. Aloe + Chamomile + Honey Mask (for Sensitive or Inflamed Skin)
Hydrates, soothes redness, and calms irritation
Ingredients:
- 2 tbsp fresh aloe vera gel (or store-bought pure aloe)
- 1 tbsp cooled chamomile tea
- 1 tsp raw honey
Instructions:
- Mix well and apply a generous layer to clean skin.
- Leave on for 10–15 minutes.
- Rinse with cool water and pat dry.
Ideal after sun exposure or when your skin feels stressed.
7. Facial Oil Blend for Gua Sha or Massage
Improves circulation, relaxes muscles, and promotes a lifted glow
Ingredients:
- 1 tsp jojoba oil
- 1 tsp rosehip oil
- 2 drops lavender or frankincense essential oil (optional)
Instructions:
- Mix oils and apply 4–5 drops to your face and neck.
- Use clean hands, gua sha, or a jade roller to massage upward and outward.
- Finish by pressing palms gently onto your skin for warmth.
Use at night 1–2x/week for sculpting, de-puffing, and deeper relaxation.
Lip Care – The Overlooked Step
We cleanse, tone, exfoliate, and moisturize our faces but so many of us forget one of the most delicate and expressive parts of our skin: the lips. Your lips have no oil glands, which means they’re more prone to dryness, cracking, and premature aging.
Giving your lips their own little ritual is not only essential for a complete skincare routine and it’s also a small act of softness that makes a big difference.
Step 1: Exfoliate (1–2x per week)
Remove dry, flaky skin and restore smoothness with a gentle scrub.
DIY Lip Scrub Recipe:
- 1 tsp brown sugar
- 1 tsp raw honey
- 1/2 tsp olive oil or coconut oil
How to use:
- Mix and apply to lips.
- Gently rub in circular motions with your fingertip or a soft toothbrush.
- Rinse and pat dry.
Pro tip: Always follow with a balm or oil to lock in moisture.
Step 2: Hydrate & Nourish Daily
Your lips need daily moisture just like the rest of your skin. Use balms that protect and repair with natural, wax-free or beeswax-based ingredients.
Best natural hydrators for lips:
- Shea butter
- Beeswax
- Coconut oil
- Castor oil
- Vitamin E
- Lanolin (for deep repair)
Choose fragrance-free options to avoid irritation, especially if your lips are chapped.
Step 3: Protect During the Day
Sun exposure damages lips just like it does facial skin. Look for a lip balm with SPF 15 or higher, especially if you spend time outdoors.
Best natural SPF lip balms:
- Zinc oxide-based lip balms
- Tinted mineral balms (for a touch of color + protection)
Apply and reapply throughout the day, especially after eating or drinking.
Step 4: Overnight Lip Mask or Oil Treatment
At night, give your lips extra care with a rich, reparative treatment that heals while you sleep.
DIY Overnight Lip Mask:
- 1/2 tsp shea butter
- 1/4 tsp honey
- 1 drop rose oil or vanilla extract (optional)
How to use:
Apply a thick layer before bed. Wake up to soft, plump lips that need no filter.
Bonus Tips:
- Stay hydrated and drink plenty of water throughout the day.
- Avoid licking your lips, which dries them out further.
- Use a humidifier in dry seasons or climates.

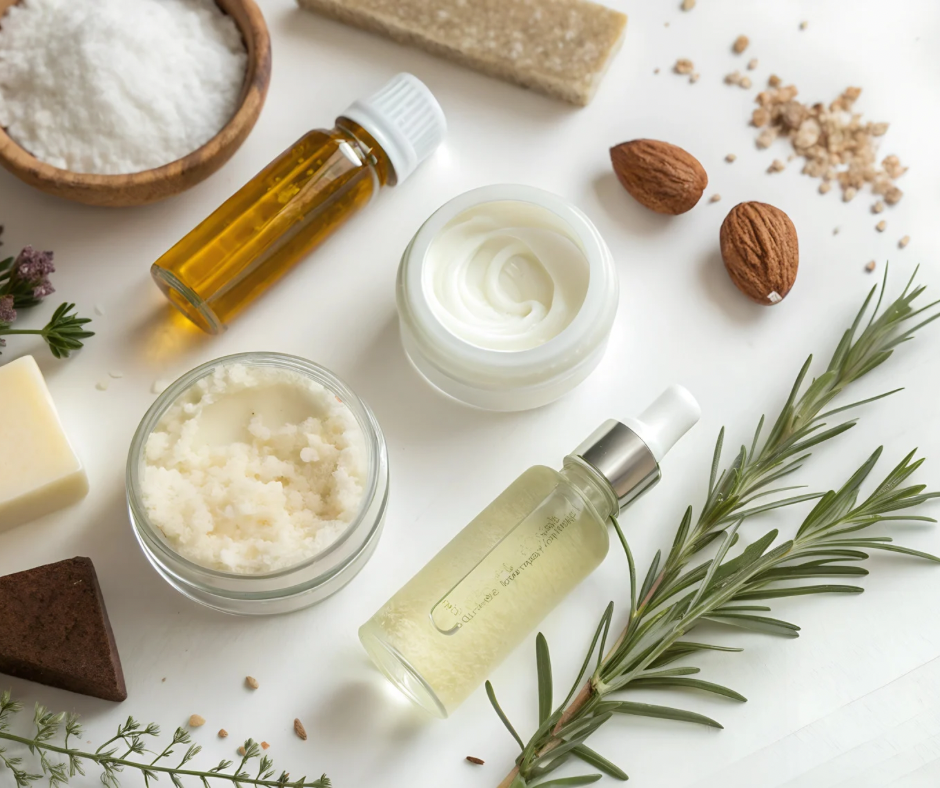
Best Natural Ingredients to Use in Your Skincare Routine
Nature gives us everything we need to nourish, protect, and rejuvenate our skin, without relying on synthetic chemicals or harsh additives. Choosing ingredients that are simple, plant-based, and nutrient-rich allows your skin to truly breathe and thrive.
Here’s a breakdown of the most effective natural skincare ingredients, organized by purpose:
For Hydration
These ingredients deeply moisturize and help your skin retain water which is essential for a supple, dewy glow.
- Aloe Vera Gel: Soothes, hydrates, and cools inflammation
- Hyaluronic Acid (plant-derived): Holds 1,000x its weight in water
- Honey: Natural humectant and antibacterial
- Rose Water: Hydrating and calming
For Brightening & Glow
These help fade dark spots, reduce dullness, and restore radiance.
- Vitamin C (from Kakadu plum or acerola cherry extract): Fights free radicals and evens skin tone
- Licorice Root Extract: Fades hyperpigmentation gently
- Turmeric: Anti-inflammatory and glow-enhancing
- Papaya or Pineapple Enzymes: Gently exfoliate and brighten
For Soothing & Calming
Ideal for sensitive or inflamed skin.
- Chamomile: Anti-inflammatory and calming
- Calendula: Promotes healing and reduces irritation
- Cucumber Extract: Cools and reduces puffiness
- Colloidal Oats: Gentle, barrier-repairing ingredient
For Gentle Exfoliation
These remove dead skin cells and promote cell turnover without damaging your skin barrier.
- Ground Oats or Rice Powder: For physical exfoliation
- Lactic Acid (from milk or fermented veggies): AHA that hydrates while exfoliating
- Fruit Enzymes (papaya, pineapple): Enzymatic exfoliation for glow
For Barrier Repair & Deep Moisture
These protect your skin and help prevent water loss.
- Shea Butter: Deeply nourishing for dry skin
- Jojoba Oil: Mimics skin’s natural sebum
- Rosehip Oil: Rich in vitamin A and fatty acids (also great for scarring)
- Squalane (plant-based): Lightweight and non-comedogenic
For Lip Care
Delicate enough for lips, yet deeply hydrating and healing.
- Beeswax: Forms a protective barrier
- Coconut Oil: Softens and repairs cracked lips
- Lanolin: Ultra-repairing and long-lasting
- Shea Butter + Honey: The perfect overnight duo
Simple DIY Skincare Recipes for Every Step
Whether you want a calming cleanser, a glow-boosting mask, or a restorative lip treatment, these natural recipes give you the glow without the guesswork.
1. Aloe + Honey Daily Cleanser
Soothes, cleanses, and hydrates that is perfect for all skin types
Ingredients:
- 2 tbsp aloe vera gel
- 1 tbsp raw honey
- 1 tsp jojoba or sweet almond oil
Instructions:
- Mix ingredients in a small pump bottle.
- Massage onto damp skin in the morning or evening.
- Rinse with warm water and pat dry.
Tip: Store in the fridge for up to 1 week.
2. Turmeric Glow Face Mask
Brightens, softens, and boosts radiance
Ingredients:
- 1 tsp turmeric powder
- 1 tbsp plain yogurt or aloe gel (for sensitive skin)
- 1 tsp raw honey
Instructions:
- Mix ingredients into a smooth paste.
- Apply a thin layer to clean skin and leave on for 10 minutes.
- Rinse with warm water and follow with toner + moisturizer.
Use once per week. Add a pinch of oat flour to thicken if needed.
3. Green Tea Toner Mist
Reduces redness, tightens pores, and refreshes the skin
Ingredients:
- 1/2 cup brewed green tea (cooled)
- 1 tbsp rosewater
- 1 tsp witch hazel (optional for oily skin)
Instructions:
- Mix all ingredients in a glass spray bottle.
- Store in the fridge and use within 7 days.
- Mist on clean skin before serums or as a midday refresher.
Soothing and antioxidant-rich and great for calming irritation.
4. Shea Butter Night Cream
Deeply moisturizes and repairs overnight
Ingredients:
- 2 tbsp raw shea butter
- 1 tbsp rosehip oil or sweet almond oil
- 3 drops lavender or chamomile essential oil (optional)
Instructions:
- Melt shea butter gently in a double boiler.
- Remove from heat, stir in oils, and whip until fluffy.
- Apply a small amount to clean skin before bed.
Great for dry, dull, or winter-stressed skin.
5. Brown Sugar Lip Scrub + Overnight Mask
Exfoliating Lip Scrub
- 1 tsp brown sugar
- 1 tsp coconut oil or honey
- 1/2 tsp olive oil
How to use:
Gently scrub lips for 30 seconds and rinse.
Overnight Lip Mask
- 1/2 tsp shea butter
- 1/4 tsp honey
- 1 drop rose or vanilla essential oil (optional)
How to use:
Apply a thick layer at night. Wake up to soft, plump lips!
A Quick Note on DIY Skincare Safety
While DIY skincare is a beautiful, empowering way to care for your skin naturally, it’s important to approach it with care and awareness. Here are a few things to always keep in mind when making and using your own recipes:
1. Patch Test First
Before applying any homemade product to your face, do a patch test on your wrist or inner arm. Wait 24 hours to see if there’s any redness, itching, or irritation, especially with ingredients like turmeric, essential oils, or citrus.
2. Use Clean, Sterile Tools & Containers
Always use clean hands, utensils, and storage containers to avoid introducing bacteria that could spoil your products or cause skin issues.
3. Make Small Batches
Homemade skincare doesn’t contain preservatives, so it’s best to make small, fresh batches and store them in the fridge when needed. Discard anything that smells off or changes texture/color.
4. Know What Not to Mix
Avoid combining strong exfoliants (like lemon juice or baking soda) with scrubs or active ingredients. These can irritate or damage your skin barrier. If you’re unsure, stick to mild ingredients.
5. Essential Oils: Less is More
Essential oils are potent. Only use 1–2 drops per tablespoon of carrier oil or butter. Avoid them entirely if you’re pregnant, nursing, or have highly sensitive skin, unless cleared by a healthcare provider.
6. For External Use Only
Even though your recipes are made with edible ingredients, they’re meant for external use only. Avoid contact with eyes, broken skin, or mucous membranes.
When in doubt, keep it simple. If you ever experience stinging, burning, or discomfort, rinse immediately and follow with a gentle moisturizer. Your skin deserves gentle, loving care and with the right approach, natural skincare can support it beautifully.
How to Build Your Skincare Routine Based on Your Skin Type
Every woman’s skin is beautifully unique, which is why a one-size-fits-all approach rarely works. Tailoring your routine to your specific skin type ensures you get the best results without irritation or imbalance. Here’s how to customize your daily and weekly body and facial care:
1. Normal Skin
Balanced, neither too oily nor too dry, with minimal imperfections.
- Cleanse: Gentle aloe + honey cleanser daily
- Exfoliate: 1x weekly with mild fruit enzyme mask
- Moisturize: Lightweight oils like jojoba or rosehip daily
- Treat: Use brightening masks (turmeric, vitamin C) 1x weekly
- Protect: Use SPF lip balm daily
2. Dry Skin
Tight, flaky, or rough patches with a dull appearance.
- Cleanse: Use hydrating cleansers with oils and honey; avoid foaming cleansers
- Exfoliate: Very gentle exfoliation once every 2 weeks (oatmeal or lactic acid)
- Moisturize: Rich creams or whipped shea butter night cream, plus facial oils like argan
- Treat: Hydrating masks with aloe, honey, and yogurt weekly
- Protect: Use deeply nourishing lip balms with lanolin or beeswax
3. Oily or Combination Skin
Shiny T-zone, occasional breakouts, but dry patches possible.
- Cleanse: Gel-based cleansers with green tea or witch hazel twice daily
- Exfoliate: 1–2x weekly with gentle lactic acid or oatmeal scrub
- Moisturize: Lightweight, non-comedogenic oils like squalane or jojoba
- Treat: Detoxifying masks with clay and charcoal weekly
- Protect: SPF lip balms that are non-greasy and mineral-based
Easily irritated, prone to redness, dryness, or allergic reactions.
- Cleanse: Very gentle cleansers like aloe and oat milk daily
- Exfoliate: Rarely or only enzymatic exfoliation once every 2 weeks
- Moisturize: Calming ingredients like calendula, chamomile, and rosehip oil
- Treat: Soothing masks with cucumber and honey
- Protect: Fragrance-free, hypoallergenic lip balms with SPF
5. Mature or Aging Skin
Signs of aging like fine lines, dryness, and loss of elasticity.
- Cleanse: Nourishing cleansers with honey and oils daily
- Exfoliate: Mild exfoliation with lactic acid or fruit enzymes once weekly
- Moisturize: Rich creams with shea butter, rosehip, and vitamin E
- Treat: Antioxidant-rich masks with turmeric and green tea
- Protect: Lip balms enriched with antioxidants and SPF
Final Tips:
- Listen to your skin: Adjust products and frequency based on how your skin feels and reacts.
- Patch test new products: Especially DIY recipes or new natural ingredients.
- Consistency is key: Beautiful skin develops over time with regular care.
With this guide, you can confidently tailor your body and skincare routine to bring out your healthiest, most radiant skin naturally.
Full Guide: https://thezenani.com/the-skin-type-test-how-to-determine-your-skin-type-guide/
Conclusion: Embrace Your Natural Glow with a Thoughtful Skincare Routine
Crafting the perfect skincare routine is more than just a daily task and it’s an act of self-love and mindfulness. By understanding your skin’s unique needs and embracing gentle, natural ingredients, you create a foundation for radiant, healthy skin that lasts a lifetime.
Remember, the journey to glowing skin is a blend of consistent care, patience, and listening closely to what your body tells you. Whether you follow every step meticulously or adapt them to fit your lifestyle, the most important thing is to treat your skin with kindness and respect.
So go ahead and cleanse, nourish, protect, and pamper yourself from head to lip to toe. Your natural beauty deserves nothing less.
Read More:https://thezenani.com/the-anatomy-of-skineverything-you-need-to-know-about-how-your-skin-functions/
YOU MAY ALSO LIKE
- Longevity as a Lifestyle: How to Live Longer, Healthier, and More Vibrantly

- The Secret to Longevity: How to Live Longer, Healthier, and Happier

- The Ancient Head-to-Toe Self-Care Ritual for Longer Hair & Glowing Skin (Inspired by Timeless Beauty Traditions)

- Ancient Morning Rituals for Longevity: How to Start Your Day Like Our Ancestors

- The Ancient Longevity Blueprint: Timeless Secrets to Living Longer, Healthier, and Happier

GET IN TOUCH WITH US
BROWSE FOR MORE
Leave a Reply